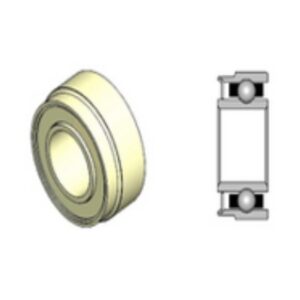
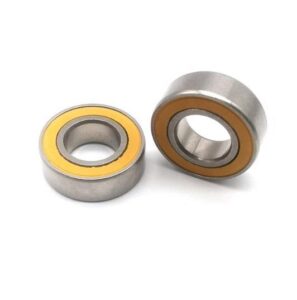
Dental handpieces are essential tools in modern dentistry, and maintaining their optimal performance often requires periodic bearing replacement, especially in high-speed handpieces like the Star 430. Properly replacing the bearings can extend the life of your dental handpiece and ensure smooth operation. This article provides a step-by-step guide on how to replace the bearings in a Star dental handpiece, along with tips for using the right tools, ensuring a precise fit, and maintaining your equipment.
Why Replace Bearings in a Star Dental Handpiece?
The bearings in a Star dental handpiece, such as the Star 430, are crucial for smooth and efficient operation. Over time, these dental bearings can wear out due to friction, heat, or poor lubrication, leading to a noisy or underperforming turbine. Replacing the bearings ensures:
- Improved performance: New bearings restore smooth turbine rotation.
- Reduced noise: Worn bearings often lead to noisy handpieces.
- Extended turbine life: Prevents further damage to the turbine and other handpiece parts.
Regular high-speed handpiece repair and bearing replacement can prevent costly damage and downtime.
Tools and Parts You’ll Need for Bearing Replacement
Before starting the replacement process, gather the necessary tools and parts. Here’s a list of what you’ll need:
Essential Tools:
- Bearing puller: For safely removing the old bearings.
- Bearing press tool: For installing the new bearings without damaging them.
- Tweezers: To handle small parts like the O-rings.
- Dental handpiece repair kit: Including a new set of ceramic ball bearings and O-rings.
Replacement Parts:
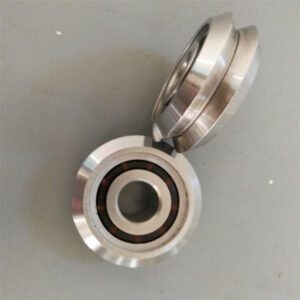
- Star dental bearing kit: Often includes ceramic bearings designed for your specific Star 430 model.
- Turbine cartridge: If the turbine is also worn out, consider replacing the entire cartridge.
- Lubricant: Proper lubrication is crucial after bearing replacement.
Ensuring you have all the right parts, including OEM or high-quality aftermarket bearings, will make the process easier and more efficient.
Step-by-Step Guide to Replacing Bearings in a Star Dental Handpiece
Step 1: Disassemble the Handpiece
Start by carefully disassembling your Star dental handpiece. Remove the head cap and unscrew the casing to access the turbine.
Step 2: Remove the Turbine (See Below for More Detail)
The turbine houses the bearings, so you’ll need to remove it from the handpiece body for proper access.
Step 3: Remove Old Bearings
Using a bearing puller, gently extract the worn bearings from the turbine. Be cautious not to damage the turbine shaft or other components.
Step 4: Clean and Inspect the Turbine
Before installing the new bearings, clean the turbine and inspect it for any additional wear or damage. If the turbine is heavily worn, consider replacing the entire turbine cartridge.
Step 5: Install New Bearings
Using a bearing press tool, carefully install the new bearings into the turbine. Make sure they are seated properly to avoid alignment issues.
Step 6: Lubricate Bearings
Apply a small amount of dental lubricant to the new bearings to ensure smooth operation and prevent future wear.
Step 7: Reassemble the Handpiece
Reassemble the handpiece by reversing the disassembly process, ensuring all components are correctly aligned and tightened.
How to Remove the Handpiece Turbine
Removing the turbine from the dental handpiece is a delicate process that requires precision:
- Unscrew the head cap: Use the correct tool to gently unscrew the head cap, revealing the turbine.
- Extract the turbine: Carefully pull out the turbine using tweezers or a turbine removal tool. Be cautious not to damage the surrounding components, such as the chuck or O-rings.
The turbine holds the bearings and is the component you’ll work on for bearing replacement.
Replacing the Bearings in the Turbine
Once the turbine is out, follow these steps to replace the bearings:
- Remove the old bearings: Using a bearing puller, carefully remove both the front and rear bearings.
- Inspect the turbine shaft: Ensure the turbine shaft is not damaged or excessively worn before installing the new bearings.
- Install the new bearings: Align the new ceramic bearings (or steel bearings, if applicable) and gently press them into place using a bearing press tool.
- Lubricate: Apply the appropriate amount of high-speed handpiece lubricant to the bearings to reduce friction and wear.
Reassembling the Handpiece
After replacing the bearings, it’s time to reassemble your Star dental handpiece:
- Insert the turbine: Carefully place the turbine back into the handpiece head, ensuring it is aligned correctly.
- Reattach the head cap: Screw the head cap back onto the handpiece.
- Test the handpiece: Run the handpiece to ensure the bearings are seated properly and the turbine spins smoothly without noise or resistance.
Tips for Maintaining Your Handpiece After Replacement
Proper maintenance after bearing replacement is key to prolonging the life of your dental handpiece. Follow these tips:
- Lubricate regularly: Apply a few drops of lubricant daily to maintain optimal performance.
- Clean thoroughly: After each use, clean the handpiece to remove debris and contaminants.
- Avoid autoclaving errors: Always follow the manufacturer’s guidelines when autoclaving to avoid damaging the new bearings.
These simple maintenance steps can help you get the most out of your newly replaced bearings.
Should You Use OEM or Aftermarket Bearing Kits?
Choosing between OEM (Original Equipment Manufacturer) and aftermarket bearing kits is an important decision. OEM parts are made by the original manufacturer, while aftermarket parts are made by third parties.
Benefits of OEM Bearing Kits:
- Guaranteed fit: OEM parts are designed to perfectly fit your handpiece model.
- Warranty: Often come with a warranty that protects against defects.
Benefits of Aftermarket Bearing Kits:
- Cost-effective: Aftermarket kits are usually more affordable.
- Wide availability: Easily sourced from multiple vendors.
For Star 430 handpieces, OEM bearings offer peace of mind in terms of fit and compatibility, but high-quality aftermarket kits can be just as effective if chosen carefully.
Common Mistakes to Avoid During Bearing Replacement
To ensure a successful bearing replacement, avoid these common pitfalls:
- Skipping lubrication: Not lubricating the bearings after installation can lead to premature wear.
- Improper alignment: Misaligned bearings can cause excessive friction, noise, or even failure of the turbine.
- Using the wrong tools: Always use a bearing press tool for installation to prevent damage to the turbine and bearings.
By avoiding these mistakes, you can ensure that your handpiece runs smoothly and lasts longer.
When to Seek Professional Handpiece Repair Services
While replacing bearings can be done at home with the right tools, some situations call for professional handpiece repair services:
- Complex turbine issues: If the turbine is heavily worn or damaged, a professional can assess whether it needs replacement.
- Frequent bearing failures: If you find yourself replacing bearings often, there may be an underlying issue that requires expert attention.
- Warranty concerns: Some repairs may void the warranty on your handpiece, so professional repair is recommended for warranty-covered units.
In these cases, seeking a free estimate from a professional service may save you time and money in the long run.
